Recently I wanted to test latest version of netatalk 3.0 on my Ubuntu Box. Unfortunately the latest binary version available for Ubuntu 12.04 is netatalk 2.2.1 from netatalk 2.X branch. As a result I came to do a little Ansible playbook that installs Netatalk 3.0.6 automatically. This article shows how to use Ansible playbook to compile, install and configure Netatalk on your machine or test latest version of Netatalk using Vagrant and VirtualBox for different Linux Distributions.
Installing Requirements and Getting the source
We need new version of Ansible to perform the installation. Instructions are available below:
Get netatalk-ansible playbook from github:
foo@myhost:~$ git clone git@github.com:GR360RY/netatalk-ansible.git
foo@myhost:~$ cd netatalk-ansible
Configuring Ansible Environment
If you just want to test the setup with Vagrant – jump to Vagrant section.
To be able to install and configure netatalk we will need to have ssh access to the target Linux system ( “localhost” in case we are doing self provisioning ). This playbook implies that “ssh user” will also be the owner of the AFP shares. In addition the ssh user need to have sudo privileges on the target system, as some task will require root privileges.
For testing purposes passwordless sudo access can be configured on target system if not available:
Add the below line to /etc/sudoers
your_username ALL=(ALL) NOPASSWD:ALL
Install sshpass on your client machine:
On RedHat based system:
[foo@centos64 ~]# yum -y install sshpass
On Debian Based system:
[foo@ubuntu1204 ~] apt-get -y install sshpass
On OSX: Compile from source http://sourceforge.net/projects/sshpass/ ( sshpass is not available in brew)
Add your target system ip ( 127.0.0.1 for self provisioning ) to ansible_hosts as folling:
1 2 3 4 5 6 | |
Configure AFP Shares, Time Machine and ssh user
- Edit
netatalk.ymlby changing vagrant user to your_username at line 4 - Update shares_list with desired Share Names and correct path.
- Edit location of Time Machine Volume
1 2 3 4 5 6 7 8 9 10 11 12 13 14 15 16 17 18 19 20 21 22 23 24 | |
Copmile, Install and Configure automatically
The next step will take some time, depending on hardware and network speed.
If passwordless sudo access is configured, run the following command to deploy:
foo@myhost:~/netatalk-ansible $ ansible-playbook -k -i ansible_hosts netatalk.yml
If not, add “-K” option:
foo@myhost:~/netatalk-ansible $ ansible-playbook -k -K -i ansible_hosts netatalk.yml
You should expect the following output:
PLAY [all] ********************************************************************

GATHERING FACTS ***************************************************************
ok: [ubuntu1204]
ubuntu1204: importing /Users/gregs/dev/netatalk-ansible/vars/Debian.yml
ubuntu1204: importing /Users/gregs/dev/netatalk-ansible/vars/Ubuntu.12.04.yml

TASK: [Check current hostname] ************************************************
ok: [ubuntu1204]

TASK: [Update /etc/hostname file] *********************************************
skipping: [ubuntu1204]

TASK: [Update /etc/hosts file] ************************************************
skipping: [ubuntu1204]

TASK: [Change hostname] *******************************************************
skipping: [ubuntu1204]

...
KNOWN ISSUES:
On Ubuntu 13.04 and 13.10 netatalk service should be started manually after installation.
Testing setup with VirtualBox and Vagrant
This repository includes Vagrantfile with recent Ubuntu versions that can be tested without playbook modifications.
Currently tested distributions are Ubuntu 12.04, 12.10, 13.04 and 13.10. Vagrant Boxes configuration is available at the top of the Vagrantfile:
1 2 3 4 5 6 7 8 9 10 11 12 13 14 15 16 17 18 19 20 21 22 23 24 25 26 27 28 29 | |
Executing vagrant up in repository directory will create and automatically configure all boxes from Vagrantfile.
Specific box can be tested by choosing os type as in the next example:
foo@myhost:~/netatalk-ansible $ vagrant up ubuntu1204
In case you want to make changes to playbook before installation, Netatalk deployment can be skipped using `–no-provision` option:
foo@myhost:~/netatalk-ansible $ vagrant up ubuntu1204 --no-provision
After changes to playbook are applied, run provisioning with vagrant
foo@myhost:~/netatalk-ansible $ vagrant provision ubuntu1204
Vagrant provision procedure can be executed as many times as you need – running provision the second time will take a fraction of the time of first run as all components are already installed.
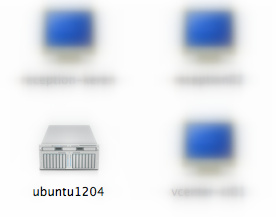
VMs are configured to use bridged interface as well, so after the installation is completed, you should be able to see new AFP host ( like Ubuntu1204 ) with shared folders in Finder.
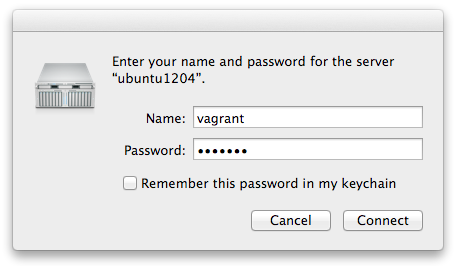
Default User and Password: vagrant:vagrant
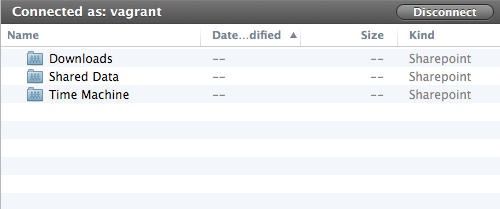
You will be able to access configured afp share:
Understanding Netatalk Configuration
The deployment procedure is based on guide provided by Netatalk Wiki Howtos. All setting can be found in the next files generated automatically during installation:
/usr/local/etc/afp.conf
/etc/avahi/services/afpd.service
Sample /usr/local/etc/afp.conf:
1 2 3 4 5 6 7 8 9 10 11 12 13 | |
Those file include only bare minimum configuration for testing purposes. Please read Netatalk Manual to get more info.
Make sure to restart your netatalk and avahi service after new configuration is applied to one of the config files:
Restart Netatalk Daemon:
/etc/init.d/netatalk restart
Restart avahi-daemon:
/etc/init.d/avahi-daemon restart